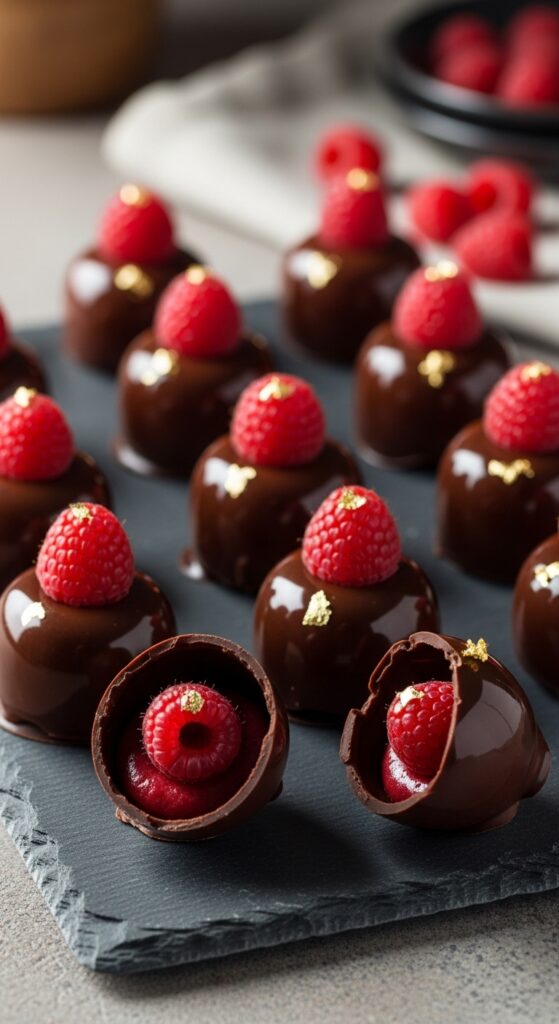
Ever bitten into a dessert that feels like a little burst of magic in your mouth? That’s exactly what happens with chocolate raspberry cups. The rich, glossy chocolate shell gives way to a sweet-tart raspberry filling, creating that perfect harmony that keeps you sneaking “just one more.” Honestly, they’re tiny indulgences, but they leave a big impression.
I first made these on a rainy Sunday afternoon, the kind where you’re curled up in the kitchen, the smell of melting chocolate filling the air. One taste and I was hooked. The balance of creamy chocolate and vibrant raspberry is a classic for a reason—it’s timeless, comforting, and just a little bit fancy without needing a pastry degree.
Why Chocolate Raspberry Cups Are So Special
Chocolate raspberry cups aren’t just desserts. They’re a little ritual. Imagine gifting them at the holidays, serving them at a dinner party, or sneaking a few during your Netflix binge. The combination of tart, juicy raspberry and deep, bittersweet chocolate is one that chefs have adored for decades.
What makes them unique is the contrast of textures. A crisp, thin chocolate shell snaps perfectly, revealing a soft, luscious center. It’s not mushy, not overly sweet, just right. And the flavor? It’s layered—chocolate richness, raspberry brightness, sometimes a whisper of vanilla or a touch of almond. You can taste love in every bite.
Beyond flavor, these cups are versatile. You can make them vegan, sugar-free, or even infuse them with a little liqueur if you’re feeling fancy. And the presentation… let’s just say they look like something out of a boutique chocolatier’s display, even if you made them in your own kitchen.
Ingredients & Substitutions
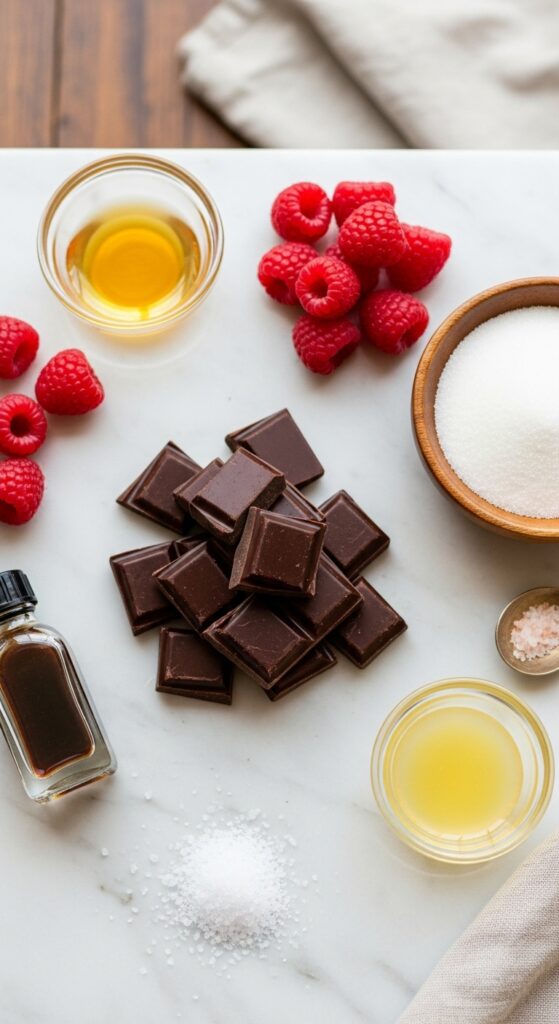
Here’s where it gets exciting. High-quality ingredients make all the difference. Don’t skimp on chocolate—it’s the star here.
Chocolate Raspberry Cups Ingredients:
- 8 oz dark chocolate (70% cocoa for richness; milk chocolate for sweeter, softer flavor)
- 1 cup fresh raspberries (or frozen, thawed and drained)
- 2 tbsp sugar (optional, depending on the tartness of berries)
- 1 tsp vanilla extract
- 1 tbsp lemon juice (optional, enhances raspberry flavor)
- Pinch of sea salt
Substitutions and Tips:
- Chocolate: Vegan? Use a dairy-free chocolate bar. White chocolate lovers can swap, but consider adding a bit of lemon zest to cut sweetness.
- Raspberries: No fresh raspberries? Frozen works fine. Just gently thaw and drain them to avoid soggy cups.
- Sweetener: Coconut sugar or maple syrup works instead of granulated sugar. It adds a subtle depth.
- Flavor Twists: Almond extract instead of vanilla, a drop of chili for a surprising kick, or a splash of raspberry liqueur for adults-only treats.
Expert Ingredient Tip: Always chop your chocolate evenly before melting. Uneven chunks can cause clumps or scorching. And fresh raspberries? Look for plump, vibrant berries—overripe ones will turn mushy quickly.
Step-by-Step Instructions
Making these might seem fancy, but it’s simpler than it looks. The secret is patience, not pressure.
Step 1: Prep Your Molds
Use silicone or mini muffin pans. Line with cupcake liners if you want easy removal. Make sure molds are completely dry—water and chocolate don’t mix.
Step 2: Melt the Chocolate
Chop chocolate into small, uniform pieces. Melt slowly over a double boiler or in short microwave bursts (20 seconds at a time, stirring between). Overheating will make chocolate grainy.
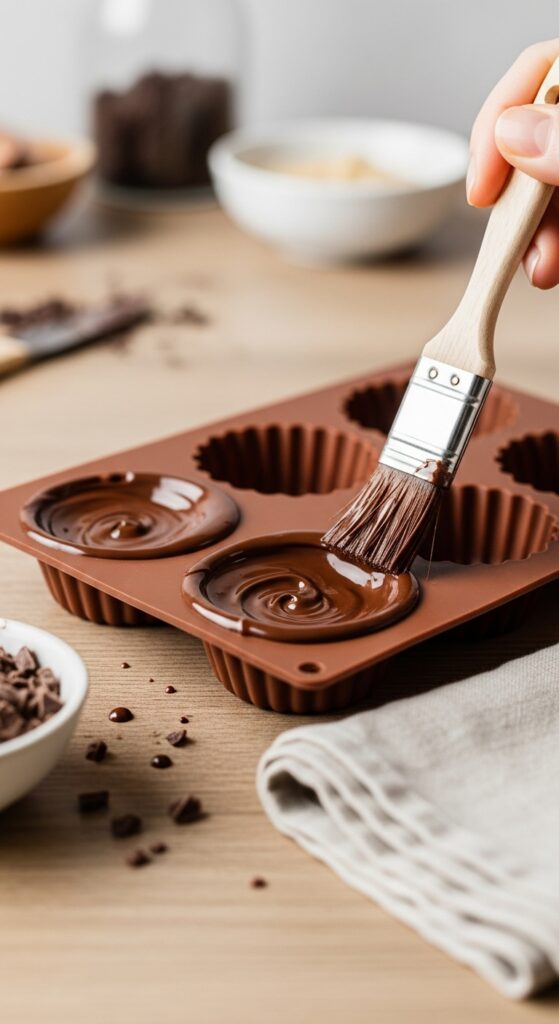
Step 3: Coat the Molds
Spoon a bit of melted chocolate into each mold and spread evenly up the sides using the back of a spoon or a small brush. Chill for 5–10 minutes until set. This is your crisp outer shell.
Step 4: Make the Raspberry Filling
Mash the raspberries with sugar, vanilla, and a touch of lemon juice. For a smoother texture, pass the mixture through a fine sieve to remove seeds.
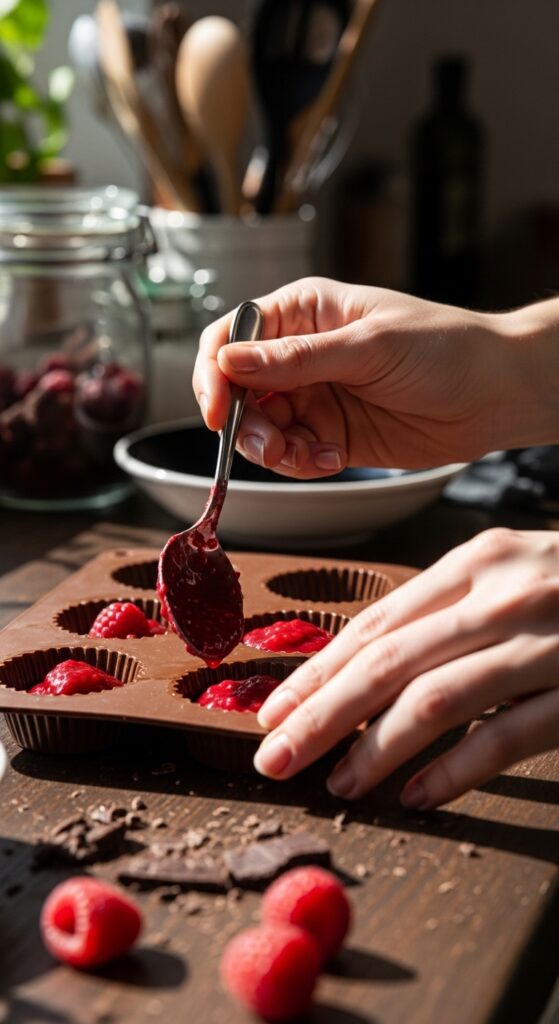
Step 5: Fill the Cups
Spoon the raspberry mixture into the set chocolate shells, leaving a little space at the top for the final chocolate layer.
Step 6: Seal with Chocolate
Top each cup with more melted chocolate, sealing the filling inside. Tap gently to remove air bubbles. Chill until fully set, about 30 minutes.
Step 7: Serve or Store
Pop the cups out gently. Serve immediately or store in a cool, dry place. Avoid the fridge unless your kitchen is very warm—chocolate can bloom (white streaks).
Variations:
- Vegan: Use plant-based chocolate and maple syrup.
- Spicy: Add a pinch of cayenne or chili powder to the chocolate.
- Nutty: Sprinkle crushed pistachios or almonds on top before setting.
Cooking Techniques & Science

Here’s where the fun gets nerdy. Understanding why we do each step gives better results.
Chocolate Tempering: Tempering ensures glossy, snap-worthy chocolate. When melted slowly, chocolate crystals realign. Skip proper tempering, and your cups may bloom or feel chalky. A quick alternative is “seeding” melted chocolate with a few solid chunks to help crystallize correctly.
Raspberry Preparation: Mashing and straining removes seeds, giving a silky filling that won’t puncture the delicate shell. The acid in lemon juice brightens the fruit and balances chocolate’s richness.
Layering: Chilling each layer solidifies chocolate before adding the next. This prevents mixing and keeps the crisp shell. It’s like architecture, just sweet and edible.
Tools: Silicone molds are forgiving, but mini muffin tins with liners work too. Small offset spatulas or brushes help spread chocolate evenly. A thermometer is helpful if you want perfectly tempered chocolate, but patience works wonders even without it.
Culturally, chocolate and raspberries have a storied history. Dark chocolate was first revered in Mesoamerican cultures. Raspberry cultivation spans Europe and Asia for centuries, often associated with luxury desserts. Marrying them in a bite-sized cup is a nod to both heritage and modern indulgence.
👉 Recipe Card
Chocolate Raspberry Cups
Prep Time: 20 mins
Cook Time: 10 mins (plus chilling)
Total Time: 40 mins
Servings: 12 cups
Ingredients:
- 8 oz dark chocolate
- 1 cup fresh raspberries
- 2 tbsp sugar (optional)
- 1 tsp vanilla extract
- 1 tbsp lemon juice (optional)
- Pinch of sea salt
Instructions:
- Prepare molds—silicone or lined mini muffin pan.
- Chop and melt chocolate slowly.
- Coat mold bottoms and sides; chill 5–10 min.
- Mash raspberries with sugar, vanilla, and lemon. Strain for smooth filling.
- Fill chocolate shells, leaving room for top layer.
- Seal with remaining chocolate; tap gently. Chill 30 min.
- Remove and enjoy immediately or store in a cool, dry place.
Nutrition (per serving):
- Calories: ~120
- Fat: 7g
- Carbs: 14g
- Protein: 1g
Serving & Pairing Suggestions

Chocolate raspberry cups deserve thoughtful presentation. Serve on a small, elegant plate, maybe with a few fresh raspberries sprinkled around. A light dusting of powdered sugar adds a snow-kissed effect.
Pair them with coffee, raspberry tea, or even a glass of sparkling wine. For a brunch twist, set alongside mini tartlets or macarons. They also work as individual gifts—wrap in cellophane with a little ribbon. The little details make them feel like a full experience, not just a dessert.
For plating, try stacking two cups, or serve with a dollop of whipped cream or a sprig of mint. The contrast of soft, bright garnish against the dark chocolate is visually striking.
Conclusion
Chocolate raspberry cups are deceptively simple but carry a wow factor that’s hard to beat. Patience and quality ingredients make all the difference. Don’t rush the layers, and don’t skimp on chocolate. Small tweaks—like a pinch of salt or a splash of liqueur—can elevate these from lovely to unforgettable.
Whether you’re gifting, entertaining, or just indulging yourself, these cups are versatile, elegant, and downright addictive. One bite, and you’ll understand why this combination has stood the test of time.
FAQs
1. Can I make chocolate raspberry cups ahead of time?
Absolutely! They store well in a cool, dry place for up to 5 days. Avoid the fridge unless necessary.
2. Can I freeze them?
Yes, but wrap individually to prevent condensation. Thaw at room temperature before serving.
3. How do I prevent chocolate from blooming?
Ensure chocolate isn’t exposed to moisture or drastic temperature changes. Properly tempered chocolate is your best defense.
4. Can I use other berries?
Definitely. Blueberries, blackberries, or even a mixed berry puree works, but adjust sugar for tartness.
5. How do I get a smooth chocolate shell?
Spread evenly and chill in thin layers. Use a small brush or spoon for control. Tempering helps, but careful layering works too.

Selena is an experienced lifestyle blogger and the voice behind many of Cozy Toned’s inspiring posts. With a passion for mindful living, home styling, and everyday wellness, she shares practical tips and fresh ideas to help readers live beautifully and intentionally.